Pottery Barn Inspired Chest Coffee Table
Happy Wednesday!
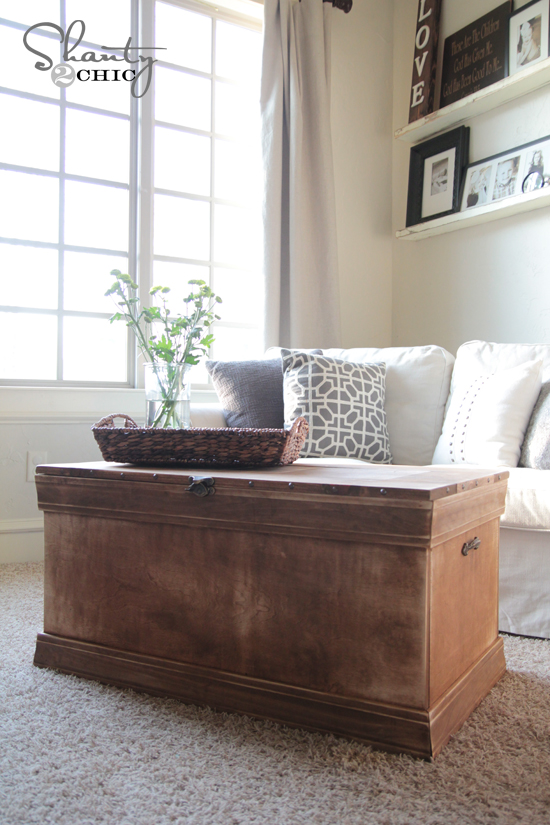
I am so excited to share my latest furniture build with you guys. I teamed up with the oh so amazingMiss Ana Whiteon this one! We had a reader email us about an amazing chest that Pottery Barn carries that she was wanting plans for. I fell in love with everything but the price tag. So… Here is what we came up with!
Isn’t it pretty?? This baby was so easy to make! It’s a great beginner build for those of you on the fence.
I will share some tips with you here, and of course you can get thefull set of plans over at Ana’s site!
So… Here we go!
Now, this plan calls for 1/2 sheets of 3/4″ and 1/4″ plywood. We love using PureBond Plywood any chance we get.
The thought of building beautiful furniture with plywood may sound a bit strange. It did to us as well! That was until we learned aboutPureBond Plywood.
PureBond Plywoodcan be found at any Home Depot.
What sold us onPureBond…
~ It uses Formaldehyde-free glue (scary to think we have been breathing in harmful chemicals until now)
~ It’s made in AMERICA… Whoop!!!
~ It’s made with wood from sustainable forests
~ It’s extremely easy to work with
~ Biggest selling point for us… It’s BEAUTIFUL! You get the look of real hard wood for a fraction of the cost. Home Depot stocks birch and oak. You can also order hickory, maple, you name it and have it delivered to your store… Love that!
So after learning the benefits ofPureBond Plywood, we will never go back. It’s such an obvious choice and it fits quite nicely in our shanty budgets!
Ash and I have shared some videos on working with PureBond. You can see themhere!
I was so excited to usemy new Kreg Jig K3 modelfor this build. I have had this thing sitting in a box for sometime, but I love my K4. I decided to give it a try, and let me tell you… It is my new FAV!
It basically does exactly what the K4 does, but has a few differences. My favorite feature is the front clamp capability!
You don’t have to reach around your board to unclamp your wood! You just do it from the front… Game changer. LOVE.
I used 3/4″ pocket holes and 1 1/4″ pocket hole screws for the whole build.
Here is a shot of an inside corner of the box. This is how I put the box together…
I attached all my trim using Gorilla Wood Glue and finish nails with my Ryobi Finish Nailer. So simple!
If you don’t have a miter saw, you can always invest in one of these! It’s a miter box and hand saw… Simple and it gets the job done!
Now for the top!
This part is so easy! You basicallyKreg Jigthe whole thing together…
Start with your center pieces… You can see where I made my 3/4″ pocket holes…
And your final step is adding those side pieces. Here is where I put my pocket holes for those…
Easy Peasy!
To finish this trunk I used one of my very favorite colors..
Rust-Oleum Ultimate Wood Stain in Early American
To give it that distressed look I used a favorite tool of ours…
Ryobi’s Corner Cat Finish Sander
I cannot say enough about how cool this little sander is. It’s lightweight and powerful at the same time. Plus… It’s cheap!!
Just sand down the whole thing until you get the look you want!
Now for the hardware…
I found my nail heads at Lowe’s as well as the cute latch for the top.
And, I found my side handles at Hobby Lobby for $3 a piece!
And a few more pics…
Whew… That’s it! Remember you can get thefull set of free plans over at Ana’s site!
Thank you so much for stopping by! Please let me know if you have any questions at all!
I would LOVE for you to pin and share this trunk with your friends! Have a good one!
~Whitney
| Created by | Shanty 2 Chic |
| Price | Free |
| Views | 15 |
Member functions
Login or register to rate, favorite and comment on plans