New Year… New Workbench Baby!
Happy New Year friends!
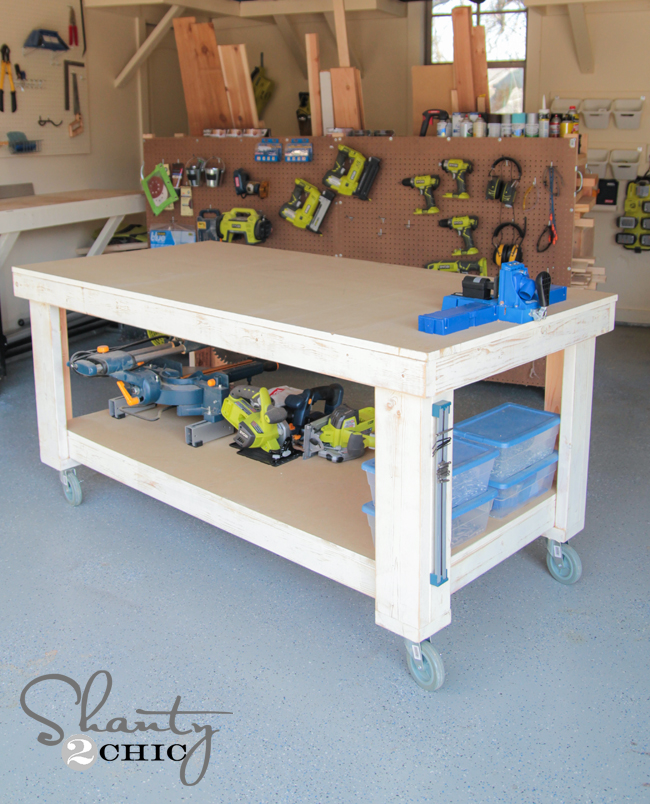
I am SOOO excited to share this latest build with you! I decided to build a little something for myself this go around. I figured it was time to get a lot of my projects off the garage floor and onto a workable space. Check out my simple DIY workbench!
Ahhh… Isn’t it perfect?? I love everything about it! Ashley and I have been working with our friends at Ryobi Power Tools to create fun DIY videos for you guys. They always have the BEST workbenches for our shoots, and I come home feeling super inspired to build one for myself. Well… I finally did. This is a large workbench, but it really is a very simple build! I tried my best to break it down for you, but feel free to ask me anything!
CLICK HERE TO DOWNLOAD THE FREE PRINTABLE PLANS!!!!!
Here we go!
2 – 2x6x8
7 – 2x4x8
2 4×8 sheets of 3/4″ MDF
4 5″ locking rubber casters
2.5″ wood screws
Kreg Jig
I started by building my frames. This workbench has two frames… A top frame, and a bottom shelf frame. Here are the measurements of both.
I used 2×4’s for both frames. I also used my crazy awesome Kreg Jig to put the whole thing together. If you don’t have a Kreg Jig, you can also predrill and attach all the pieces with 2.5″ wood screws. But, I totally suggest the Kreg Jig! Makes this part a breeze and you won’t have screws showing on the outside.
I used 1 1/2″ pocket holes and 2 1/2″ pocket hole screws to attach all my pieces. I did this because the width of the wood is 1.5″.
Now for the legs! Each leg is made from one 2×4 and one 2×6 piece. These measure 26.5″ long each. I attached the legs together first using my Kreg Jig. You can see where I put my pocket holes into my 2×4 pieces. I did 3 on each 2×4 piece. Then, I used Gorilla Wood Glue and 2.5″ screws to attach the legs together.
Here is another shot of the legs…
Each leg will also have a 5″ 2×6 piece on the bottom of each leg. These will hold the bottom shelf in place and hold the casters once it is all built. I used wood glue and 2 1/2″ wood screws to attach these to the bottom of each leg. Here it is after I attached the frames to it…
Once I had all the legs built, I attached them to my frames. The legs will line up on the outside of the bottom shelf frame, and on the inside of the top frame. I used heavy duty 2.5″ torx screws on this part. You can see them on the inside of my top frame. I also used my drill to pre drill before attaching.
Now for the shelves! This is the heavy part…So I got my hubby to help me lift them up. I used 3/4″ MDF for each shelf. I had the nice guys at Home Depot cut it down for me.
Here are those measurements…
Bottom Shelf – 30″ x 66″
Top Piece – 36″ x 72″
I used my Ryobi Airstrike Nailer to attach both pieces of MDF. I didn’t use glue on this part, because I want to be able to easily change out these pieces when they get too worn.
That’s it! My final step was adding the casters which I found at Northern Tool. These are 5″ rubber locking casters. I also gave the my frames and legs one fast coat of white paint and used my Corner Cat sander to distress them a bit… Every good workbench should be cute too, right??
Did I mention I totally love it?? Just checking! I built the whole thing for under $130.
Thanks so much for stopping by! I would LOVE for you to pin and share my new workbench with all your friends! Let me know if you have any questions at all!
~Whitney
| Created by | Shanty 2 Chic |
| Price | Free |
| Views | 15 |
Member functions
Login or register to rate, favorite and comment on plans