Closet Storage – Towers
Hey guys! I’m back with an addition to my Modular Closet Storage System! If you missed my Shoe Storage Cabinet you can see itHERE!
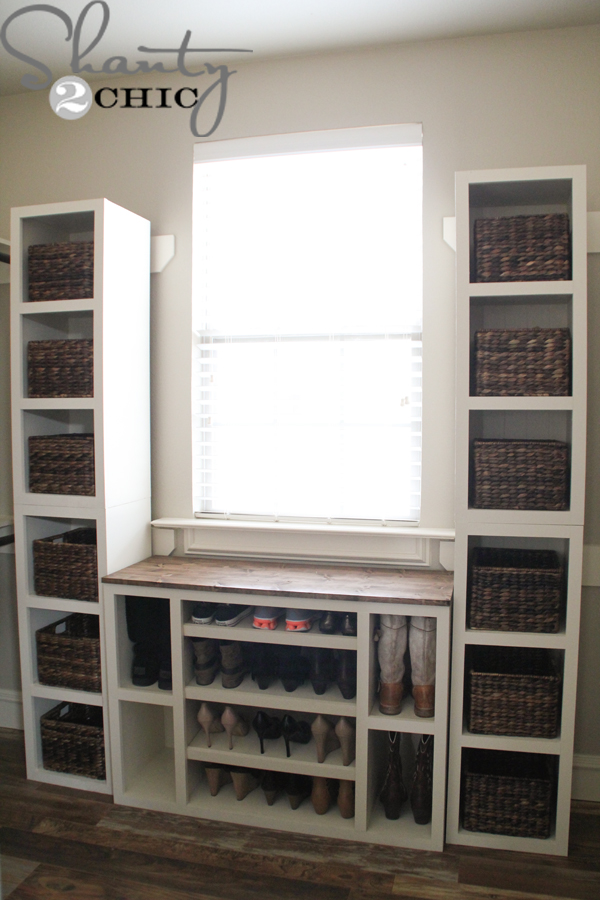
This week I got busy with these storage towers! There are four in this picture and they are about 42″h x 15″w x 13″d. These are great because you can stack them, place them side-by-side, flip them sideways… You really can do whatever suits your closet needs best! I built four to surround my window.
You can click the image above orHEREto print the FREE Plans! I’ve also got the step-by-step tutorial to make building these even easier!
I usedPurebondPlywood to build the body and shelves of these cabinets. This is the only plywood we will use to build because it is formaldehyde-free. You can learn more about why we took the Purebond PledgeHERE.
I had the hardware store rip my plywood down then brought it home and made the rest of the cuts with myKregRip Cut and my miter saw. We love our Rip Cuts! They are great for ripping your plywood pieces that are too wide to cut on your miter saw, they take up less space than a table saw and they are only $34.99 (I’ve added a link at the bottom of this post to the Rip Cut on Amazon). You just attach it to your circular saw and cut. The blue piece on the end will run along the edge allowing you to make straight cuts. If you don’t have a Rip Cut you can have the hardware store make all of the cuts for you.
I used my Kreg Jig to drill 1 1/4″pocket holesinto the shelves. Refer to the plans for the correct pocket hole placement.
Here are the cuts for one tower.
I built the cabinet first with 1 1/4″ pocket hole screws and wood glue.
Then, I measured and cut for my 1×2 pieces for the face frame. Before I built the face frame, I marked where each shelf piece should go.
I attached the face frame with 1 1/4″ pocket hole screws and wood glue.
To attach the face frame to the cabinet, I used wood glue and my 18 gauge Ryobi Airstrike nailer. If you don’t have a nailer, you can use a hammer and finish nails.
I always opt to build my pieces first then measure and cut the backing to fit. I chose thisV-Groove Panelfor the backing but there are several different options ?
To attach the backing, I used my Airstrike Stapler and wood glue. If you don’t have this stapler, you can also use finish nails! I like to use the stapler for the backing because it can often slip off of the nails.
Here they are ready for paint! I used two coats of Behr Cozy Cottage with an eggshell sheen to finish them! Once the paint was dry I moved them into my closet and added some cute baskets!
If you are stacking these, make sure to attach them together. I used 2 1/2″ wood screws and drilled them from the top of the bottom tower into the bottom of the top tower. You can also attach them to the wall with “L” brackets if you ware worried about them becoming ladders ?
I found these baskets at Pottery Barn. I was a little disappointed because the measurements online are not the true measurements of these baskets. I purchased the 12″ square x 8″ high Utility Baskets. When I received them, the tags on the baskets read something different than the specs and when I measured them myself, they measured different from the tags and the online specs. Needless to say, they were on sale for $15 and I had free shipping so they were a good deal for good quality baskets and they fit perfectly if I flipped them sideways so…I’m keeping them. If you are interested in the baskets you can see themHERE. I just wanted to make you aware that the specs are not accurate.
Phewf! Loving my extra storage in my closet – it really feels like my closet grew with just these pieces! I have several more pieces to add to this and I can’t wait to show them to you! But first, I have to build them ?
Thanks so much for stopping by!
~AshleyAmazon.com Widgets
| Created by | Shanty 2 Chic |
| Price | Free |
| Views | 14 |
Member functions
Login or register to rate, favorite and comment on plans